


Simply Your Deck Staining or Painting Project
Before you get started on your deck staining or painting project, I have a few tips I would like to share that will likely save you some time during your planning, performance and cleanup phases of the project.
#1 Apply within recommended temperature guidelines
This Deck staining and painting tip is a simple one, but it’s often overlooked. Virtually all paint and stain products have manufacturers instructions on the container that specify the temperature ranges (high and low) that the product should be used for optimal results. Once you get outside of these ranges or close to the top or bottom end of the ranges your results may be less consistent. Basically, you’re on your own!
The higher the temperature the faster your product will dry. This sounds like a good thing, but this actually results in you having less time to apply the stain or paint. This means that you will have to work faster and that you have less room for error.

On the other end of the spectrum, if you are applying your product in low temperatures it will not dry as quickly as it should. Until your product is dry to the touch, anything that comes into contact with it can blemish the finish (this includes, leaves and falling tree debris as well as feet).
Another concern when painting in cold weather is that the paint may not hold or adhere to the surface that your painting. This is of particular concern for vertical components such as posts, handrails, and pickets. If the paint doesn’t hold you may begin to see it sag. So, pay attention to the weather forecast for not only the specific time that you plan to paint or stain, but also for the time needed for it to dry. Many of the paint and stain products will clearly state not to use the product if the temperature will drop below XX degrees within XX hours after application. The same type of guidance is also typically given for rain.


There three main options: Brush, Roll, and/or Spray.
Brush
Pros: Brushing the stain on will help to ensure an even coat all over and will also likely use the least amount of product. It will also require the least amount of supplies, so you save there too. Another plus is that the brush can be cleaned without too much effort and reused on your next project.
Cons: Brushing is the slowest technique and not just by a little bit. It also will require you to spend a lot of time on your knees as you work the paint or stain with the brush
Roller
Pros: Rolling is faster than brushing because the roll will hold more paint or stain, and therefore you can cover more area faster than using the brush.
Cons: It will not be easy to apply paint to tight areas and corners with the roller. They do make some very small rollers that can help with this, but you still may have some areas that will be difficult to reach. Using a roller will also require more supplies – you will need the roller cover, the roller frame, and a roller tray or roller screen. Another issue with using the roller is the cleanup (if you plan to keep the roller cover and tray). It typically takes longer to clean paint roller cover than a paintbrush because the roller holds more paint than the brush (sort of like a sponge).
Airless Paint Sprayer
Pros: Spraying is by far the fastest of these 3 methods. It also makes it easy to apply paint in tight areas as well as painting tedious components like pickets.
Cons: The sprayer does require more technique to get the best finish. And even then, its usually advisable to have a brush or roller on hand to address any runs, as well as rags to clean up any overspray. The sprayer is the most expensive of the 3 techniques. If you don’t own a sprayer, it’s going to be more cost effective to rent one. The sprayer also has a steeper learning curve as it is a machine and has a lot of moving parts. It’s easier to make a mess by getting paint on things you weren’t trying to paint (overspray). The sprayer also takes the most time to clean out of the three options and likely wastes the most product.

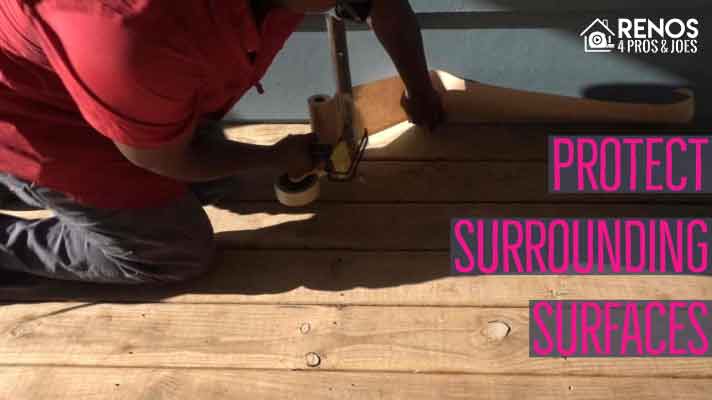
#3 Preparation
Preparation, Preparation, Preparation. This is an important step that many DIY painters overlook. But, it’s really important and can drastically affect the way your finished project turns out. The goal, in a nutshell, is to cover all the areas and objects that you don’t want to get paint on. It’s SO much easier to cover up than to go back and try to spot remove paint from the areas and places where you’ve oversprayed, dripped, and dripped paint. Drop cloths are one of the most common items used to keep paint off of your things. Other products that are commonly used are painters plastic, paper and tape, paint shields. Examples of some items that you likely want to avoid getting stain and paint on are: your house/building, windows and window screens, walkways, landscaping to name a few

#4 Color selection
When selecting a paint or stain color for an exterior deck you should always be mindful of your surroundings. Trees, bushes, plants can shed leaves stems, and debris onto your deck. The proximity of your deck to these plants will determine how much of a factor this is for you. Many types of plant debris can transfer pigment onto your deck merely from falling and laying on the deck for a period of time. This effect can be magnified by rain.
In my experience pigment transfer is typically more of an issue with stained decks than painted decks, but it is a concern for both products. But, depending on the amount of time the debris remains on the deck can drastically affect how much pigment comes off one to the deck and how easily it can be removed.
The lighter the color you choose, the more likely pigment transfer will be an issue because it will show the dark stains more readily, while darker colors tend to do a better job of hiding these issues.
#5 Planning
The underlying theme that is consistent with the tips above is proper advance planning. I know that lots of us wait until we are about to host an event or gathering at our property before we spring into action to tackle this type of project. This is fine, just make sure that you give yourself enough time to complete your project and that you have your plan in place before you start. If you’ve waited until your time is very tight to begin your project, you have to be able to decide if you really have enough time to do the project correctly. Is it worth the added stress? And, if you can’t complete it correctly what are the consequences?