
Everything I Wish I’d Known Before I Limewashed My Brick House
I just limewashed my brick house for the first time ever. I did a fair amount of research before I decided to take on the project. There was not a lot of detailed information about the process. Today, I will share my complete limewash experience in order to help others answer the question “Should I limewash my brick house?”
You should limewash your brick house only after you have considered all the pros and cons. You must also be accepting of the fact that once limewashing is complete, it will be extremely difficult (if not impossible) to restore your brick home to its original color. Do not limewash your brick home if you are unsure how you feel about the existing color of your brick home. You can’t be on the fence about the existing color, because there is basically is no going back. If you end up not liking the limewash look, you can definitely change it, but you likely will not be able to return the brick back to its original look.
Now lets’ get into details of limewashing. Once you finish reading this post you will be aware of the major factors to consider and you will be much more prepared to make the right decision for your situation.

Best Weather for Limewashing
I first read and then confirmed through my own experience that it is best to apply the limewash during mild dry weather. You don’t want the temperatures to be too hot or too cold or too wet. you also don’t want to apply limewash to a brick exterior when there is rain predicted forecasted in the near future.
Limewash is designed to dry out gradually. This can be more difficult to accomplish on exterior walls that are exposed to direct sunlight during hot weather. The heat from the sun and hot temperature can cause the limewash to dry faster than it should for optimal results. Conversely, the moisture from rain and humidity can slow down the drying of the limewash.
On a side note, preparing your home for exterior painting is an excellent time to clean out your gutters and downspouts. Be sure to check out the article I wrote about the importance of gutter cleaning.
Applying Limewash in Cold or Cool Weather
Most instructions for lime wash advise not to use it when its 40 degrees or below outside. However, much like paint, it’s most ideal to apply the limewash during warmer weather. Keep in mind that you have to mix the limewash paint with water and you also have to keep the exterior brick walls wet with water prior to applying the limewash.
And depending on the finish that you select you may need to power-wash some of the limewash off the brick surface in order to get your desired look. With that being said, working with water when its cool outside is no fun. Also, pay attention to the overnight temperatures as the cold weather can prolong the overall curing time for the limewash.
Where to Buy Limewash
Premix limewash comes in buckets. It’s typically sold in specialty paint stores and by online retailers. But I suspect that as it becomes more and more popular, it will eventually become more readily available in stores. I was plotting on purchasing my limewash supplies online for weeks.
But I lucked out and found the product in a home improvement store. It was interesting because even when I scanned the item with the store phone app, it showed that the item was only for sale online and it did not show that the store had any inventory. I’m not exactly sure why it was there, but I jumped on it. It never hurts to check the store regardless of what the website shows or doesn’t show in inventory. For those who are interested in what product I used, I won’t keep you in suspense any longer. I used Romabio Classico in Avario White (click here to see it on Amazon).
Mixing Lime Wash
Mixing a premixed limewash paint out of the bucket is a job in itself. It’s important to note that when you get the premix limewash in the bucket it’s basically the consistency of clay (at least mine was). It’s extremely lumpy and is pretty much one big glob that you have to kind of scoop and measure out and then mix in a different container.
I mixed my limewash by hand with a stick. I would not recommend this method for anyone else. It took forever to mix with water and required a lot of Labor. I was caught totally off guard by this. If I had to do the project again I would have purchased or rented a mixing paddle and a drill suitable for this type of mixing. As it turned out I ended up getting an arm and shoulder workout in before I even got started painting.
Batch size
When you are mixing your limewash you have to be consistent with your batch size and mixture. The proportions of limewash and water that you mix together will determine the level of transparency the limewash will have once it’s applied to the brick. I scooped out my limewash paint from the bucket that it came in and put in a separate 5-gallon bucket. I then measured and added the required amount of water to the bucket and mixed it there.
However if possible it’s probably best to mix bigger batches so that you can ensure that your limewash will have consistent transparency and color when you apply it to the walls. If you have to mix in small batches like I did you need to be very careful to measure out the limewash paint and water so that you have the best shot at getting a more uniform look on all of your walls.
If you don’t have the ability to mix in large batches it may be good to try at least mix-up batches that are large enough to cover one wall at a time. That way each wall will look consistent all the way across from one side to the other. Otherwise, if you run out of limewash in the middle of a wall and have to start a new batch you could end up with some coloring consistencies that will be visible when the limewash dries.

Applying Limewash With a Brush
Let me start by saying that I did not apply my limewash with a brush. But after trying other techniques, I believe that applying the limewash with a brush is the best method. Working with a brush will give you the most control and a consistent application. You will be less likely to have too much lime wash in some areas and not enough in others. Plus because you will be working at a slower pace, you can see and address most application issues the first go-round, instead of trying to come back and fix them.
I’ve painted quite a few decks in my day, and my preferred brush can be used for limewash applications as well.
Applying Limewash with an Airless Paint Sprayer
I chose to shoot for the stars on my first application and decided to use an airless paint sprayer. If I had to do it over again, I’m pretty sure I would not use this method. I ran into all types of problems because of the thick consistency of the limewash. It really gummed up my sprayer gun and filters and ended up being a complete mess. I will concede that I may not have mixed it long enough or thoroughly enough.
It was really hard to judge because each scoop of clay from the limewash bucket was different in consistency. My first scoops were pretty soft and easy to mix, but as I went further into the bucket the limewash mix was a lot stiffer. I think the biggest problem was that even after I mixed my limewash with water, it was still too lumpy to be able to run through the paint sprayer without having issues.
Leave it to the Pros
However, even if I had mixed the limewash for a long time I still think that I would have had issues with running it through the paint sprayer because I think the minerals would begin to settle out of the mixture. I suspect that the limewash professionals who do this all the time have to break down their sprayer sprayers and clean out all the filters and guns and components on a regular basis.
So my word to the wise is even if you have your own paint sprayer don’t use it to complete this type of project. And don’t rent one from the hardware store either because if you bring their paint sprayer back all gummed up, you will not get your deposit back and they’re probably going to skin you alive with cleaning fees.
Do yourself a favor and just brush it on. It will definitely take longer to apply, but simpler can be better because you have fewer things that can go wrong.

The Finished Look
Before you start applying your limewash you need to decide what look you’re going for. Some limewash brick homes have an even finish that is uniform across the entire house. While others have a more inconsistent blotchy look that gives the house a more of an old-world look. Do your best to decide which look is right for you before you begin painting.
Selecting Colors
I always suggest testing your color samples in small areas before you move forward with the overall project. This is true whether you’re using a limewash paint or regular paint. If you can’t get samples, at least get some paper swatches so that you can see an in-person color presentation.
Study Photographs Closely
I did a lot of research on colors online. What I noticed was that for most of the brick home limewash pictures that I saw featured houses that faced the sun. The homes in pictures had little if any trees or tall vegetation blocking direct sunlight. The amount of direct exposure can greatly affect the way a color looks on a particular home. Additionally, most of the pictures were professional photographs which are often touched up in photo editing software.
My advice is to get as close to your desired colors as possible by searching the internet and buying or looking at paper sample swatches. Once you think you have your color narrow down to just a few purchases the samples and try them out on the property if possible.
As an aside, I thought I had pretty much decided on what color I was going to use based on looking at lots of photographs on Pinterest and other websites. But when I finally looked up the paint color on the manufacturer’s website I got a pretty big shock. The paint color looked very different on the sample than it did on the homes that were in direct sunlight.
On a different note, I have written an article on the best way to paint vinyl shutters. Be sure to check it out if you are replacing or repainting shutters as part of your exterior limewash project.

Get Samples if Possible
I purchased all my samples and tried them out on the house to make sure that I had the color that I want it before I purchased a large amount. As I suspected, the paint color was still initially leaning towards was still a no-go even after I put it on the wall.
There is no replacement for applying samples to the subject property. pictures and paper samples can get you close but actually putting the paint on the wall will help you decide for sure.
Do Your Research
Make sure that you look at as many pictures as possible as well as the different looks and styles that you are interested in before you pull the trigger. I would also encourage you to focus on looking at pictures taken by homeowners instead of professional photographers. This may take a little more digging, but they are out there.
You want to make sure that you Manage your expectations. Looking at professional commercial photography of limewashed homes will help you get a general idea but you need to have a very good feel for what it’s actually going to look like in person.
I feel that the best way to do that is by looking at photographs taken by regular people. You will see that every finished product doesn’t look the same. some limewash projects look amazing While others seem to fall flat.
In general, limewashing is a more complicated process than simply painting the exterior of the home. With paint, your main concern is whether you like the color and then whether or not it is applied evenly. With limewash, the application and finish can vary greatly and is directly dependent upon what the brick looks like before it’s painted (especially if you are going with a semi-transparent finish).
Lime Wash Cost
As I mentioned before I used a premixed lime wash. The product that came in a bucket. I just had to add water, mix, and apply it. These types of products can easily run $75 per gallon. This price may be expensive when compared to exterior paint, depending on the type of paint that you normally buy.
The coverage you will get with each gallon will depend on how much water you add to your lime wash mix. The more water you add, the more transparent your finish will be. Also, be aware that you can apply more than one coat in order to achieve your desired color and finish.
I have read that if you chose to truly make your own limewash, and you are able to purchase the materials locally, the cost can be really really low. I didn’t want to get that involved in the process.
But had I gone with that option, I may not have had the issues with it being lumpy. But on the other hand, I would have been responsible for adding pigment to get the desired color. There are pros and cons to each limewash, but one thing is for sure, either option is more involved than regular paint.

How long does it take to Lime Wash a House?
It depends. What I can tell you for sure is that it takes a lot more time to apply limewash than it takes to apply paint. You need to block off some serious time so that you don’t rush yourself. Even though I didn’t brush my limewash on, I do have quite a bit of experience with applying paint to block, brick and drywall with a paintbrush.
Brush-painting is just slower. Imagine if you were going to paint the interior walls of your house with a brush instead of a roller (That’s actually the way it was done before rollers became popular). You also have to factor in that you may need to apply more than one coat and that you may have to wash some areas with water in order to achieve your desired look.

If You are Hiring a Contractor
If you decide to hire a contractor to limewash your home, for your sake and the contractor’s sake, make sure that they have experience working with this type of product. It’s highly likely that if the contractor you select does not have experience working with limewash (premixed) they will underbid the job. This will rear its ugly head once they start working with the product and realize that limewash does not behave like paint.
And they are going to have to know how to control the finish in order to TRY to please the customer. Remember that your finished look is going to in part depend on what color and texture the original brick. You likely will not be able to get the complex color depth if all of your bricks are the same color (ex. no dark colored bricks or light colored bricks mixed in with the pattern.
Selecting Trim Colors for Limewash.
I also spent quite a bit of time researching trim colors for lime wash houses. I ended up selecting a paint color for the trim that was the same color as the limewash. The trim sheen that I selected was somewhere between matte and semi-gloss. I also had to consider the fact that the home has an addition where wood siding was used instead of brick.
I didn’t want to paint the wood siding a color that was drastically different from the brick or that would draw attention to the addition. So I played it safe and painted the wood siding and a flat paint the same color as the brick that was the same color as the brick limewash
House Type
Another factor to consider when planning on a lime wash brick or paint project is the style of the home. I noticed during my initial research that the majority of the homes that were shown online with lime wash brick were two stories. My house is a ranch. My house was also an extremely dark red brick and all the bricks for the same color on this entire house.
The type of bricks on your house are going to greatly affect how to limewash looks if you’re going for a more transparent look. Generally speaking, you should expect to get a more varied look if your bricks have a varied color. I did try the washed off weather look. But I felt that the fact that the house is one-story with a hip roof didn’t give me enough wall height to allow for enough space between the areas where I washed the brick off. it obviously all comes down to personal preference.
Stairs, Planter Beds, and other Horizontal surfaces
It’s also important to note that limewash is not designed to adhere to horizontal surfaces. So steps and everything that can be walked on or receive direct contact from rain and water it’s not going to be suitable for limewash. This house has brick planter beds around the exterior of the house as well as brick and concrete front stairs none of which are ideal locations for limewash. I planned ahead and used a paint that was the same color as the limewash to paint these areas since I knew the limewash would wash off in no time.
The Finish
I was pretty sure from the outset that I wanted my brick limewash to be a consistent white color. But I applied the lime wash in two different ways on two different exterior walls at the house.
On the first wall, I tried to apply the limewash as uniformly as possible to make it just look like a white wall. On another wall of the house I spray the limewash on pretty evenly and then I came back with a water hose with a spray nozzle and sprayed off some of the limewash to create a more weathered old style look.
I wasn’t really that excited about the old world style look. it came out okay but it just didn’t suit the style of the house.
So I ended up deciding to go with a uniform finish on the entire house. The limewash paint went on okay but it did not dry completely even and left some light spots that had to be going back over again.
There is one side on the home’s exterior where the soil it’s moister than in other areas. This wall seemed to really take a long time to cure.
Another interesting thing that I noticed was that when it rained the limewash appeared to be more transparent on certain walls than it was when it was dry outside. This may have just been my imagination but I’m pretty sure it wasn’t.
Painting vs Limewashing
So if you’re still reading this you probably have been able to deduce that I’m not extremely excited about the way that my limewash project was turning out. So I made a BIG CHANGE.
After much deliberation, I decided to scrap the limewash idea completely. I pressure washed the entire brick exterior and removed as much of the limewash as possible. I decided to start this process about a month after the initial application of the limewash.
Some of the limewash did come off, but the majority remained, and it was nowhere near its original color. This wasn’t a big deal since I was going to paint it anyway.

Painting the Brick
Believe it or not, I was actually very pleased with the color of the limewash. It was the application and the finish that gave me fits.
So I primed the entire brick exterior with a high-quality exterior primer suitable for brick. And then I painted the entire brick exterior of the house. I used a color ( in a flat finish) that was basically the same as the limewash color that I originally selected. It looks awesome. And I don’t say that much. But I am SO pleased with the way it came out. It looks like a real doll house. See new photos below that I recently shot (and edited).

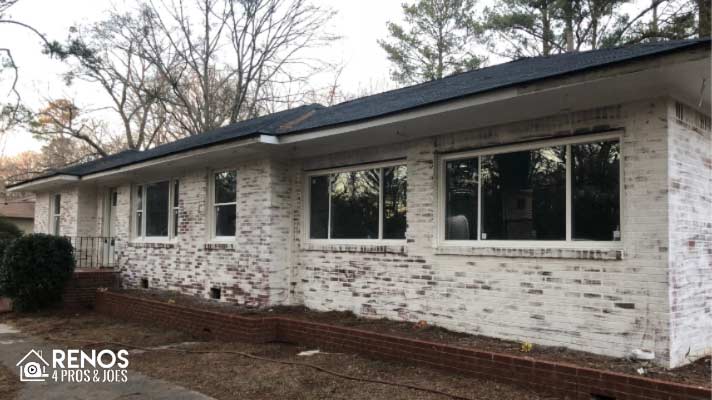
Limewash Brick House before and After
Expect to be surprised. Regardless of whether or not you are a homeowner or a contractor expect to be surprised. The reason that I say this is because you cannot accurately predict exactly how the limewash finish will turn out. Trying to achieve a completely uniform look will be a challenge. And if a uniform look is your goal, you will probably come out better just painting the brick.
With that said, there is definitely an art to applying the limewash. The finished look will appeal to some, but it will not appeal to everyone. The better you can prepare yourself for the uncertainty the better off you will be. Worst-case scenario, do like me and have a Plan B, just in case.

